
Blog
12 Jaw-Dropping Upcycled Furniture Projects That Look Brand New (Budget-Friendly Makeovers!)

Have you ever looked at a piece of old furniture and thought it had potential? Maybe that worn-out chair in the corner or the scratched-up table in your garage has more to offer than you realize. I created this post because upcycling is not just a trend; it’s a chance to breathe new life into the things we already have. Plus, doing it on a budget feels pretty rewarding!
If you’re someone who loves DIY projects, thrift store finds, or simply wants a stylish home without breaking the bank, this one’s for you. You might be a seasoned crafter or just starting out, but either way, there’s a little something here for everyone. Upcycled furniture is the perfect way to express your creativity and add a personal touch to your space.
In this post, you’ll discover 12 jaw-dropping upcycled furniture projects that look brand new. Each idea is budget-friendly and packed with tips on how to achieve stunning results. Imagine transforming a dull dresser into a chic statement piece or giving an old bench a fresh coat of paint to brighten your entryway. Not only will you save money, but you’ll also have the satisfaction of creating something unique.
So roll up your sleeves and grab your tools! Here’s your chance to turn the ordinary into the extraordinary. Whether you need a weekend project or a bit of inspiration, these makeovers will spark your imagination and help you see the beauty in what you already own. Let’s dive in and start transforming!
1. Vintage Suitcase Coffee Table
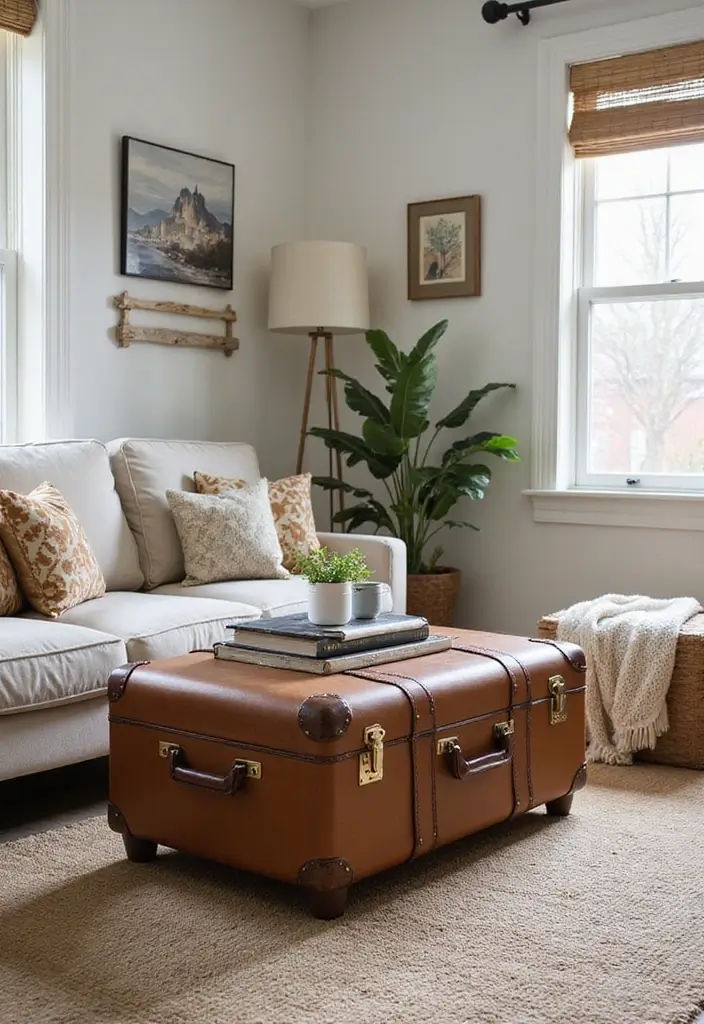
Create a stunning centerpiece for your living room with a vintage suitcase coffee table! This unique piece not only brings a touch of nostalgia but also adds a stylish vibe to your space. Imagine a well-loved suitcase, perhaps in a rich brown or a cheerful pastel, positioned in front of your sofa. You can find inspiration for this trendy design on platforms like Pinterest or Instagram, where upcycled furniture ideas shine.
To make your own, start by choosing a sturdy vintage suitcase that can open flat. You can pair it with sleek hairpin legs for a modern twist or opt for classic wooden legs for a cozy feel. Secure the legs to the suitcase using screws or brackets. For a personal touch, line the interior with a fun wallpaper or fabric that tells your travel stories. This not only enhances the aesthetic but also provides hidden storage for magazines, blankets, or other treasures.
Here are some practical tips to help you create your very own vintage suitcase coffee table:
• Choose a suitcase that complements your existing decor colors.
• Pick legs that match your style—hairpin legs for modern or wooden for classic.
• Add fabric or wallpaper inside for a personal touch and extra charm.
• Place it prominently in your living area to spark conversations and store items.
This coffee table is perfect for those who love to mix style and function. It not only serves as a conversation starter but also makes your living room feel inviting and well-organized. With just a little effort, you can create a piece that feels brand new while reflecting your personality!
Vintage Suitcase Coffee Table
Editor’s Choice

ELLDOO Vintage Wooden Storage Chest, Portable Decorative Luggage Suitcas…

SMARTSTANDARD 16″ Hairpin Furniture Legs, Metal Home DIY Projects for Ni…

MelunMer Geometric Peel and Stick Wallpaper Gold 118In L 17.7In W Self A…
2. Dresser to TV Stand

Transforming an old dresser into a stylish TV stand can breathe new life into your living space. This DIY project not only saves you money but also adds a personal touch to your entertainment area. Imagine a beautiful, handcrafted piece that stands out in your home!
Start by taking out the drawers. This opens up valuable space for your TV and other electronics. You might want to keep a few drawers for storage. They’re perfect for stashing away remotes, video games, or even cozy blankets. Sand the surface to smooth out any rough patches, then choose a paint or stain that reflects your style—think deep blue for a nautical vibe or a light gray for a modern twist.
Add a pop of personality with a fun wallpaper back panel. This detail can tie in your room’s color scheme beautifully. You can find plenty of inspiration on Pinterest, where unique DIY projects are trending.
To make this transformation easy and budget-friendly, consider these tips:
– Choose a color scheme that matches your decor.
– Pick a wallpaper that adds visual interest to the back panel.
– Use reclaimed wood for a rustic touch.
– Add decorative knobs for a personalized finish.
With a little effort, you can create a one-of-a-kind TV stand that elevates your living space. This project is perfect for those who want to express their creativity while keeping the budget in check. Your new TV stand will not only look great but will also feel like home.
Dresser to TV Stand
Editor’s Choice

ALL-IN-ONE Paint, Durable cabinet and furniture paint. Built in primer a…

Art3d Smoothing Tool Kit for Applying Peel and Stick Wallpaper, Vinyl Ba…

20 X Mix Vintage Look Flower Ceramic Knobs Door Handle Cabinet Drawer Cu…
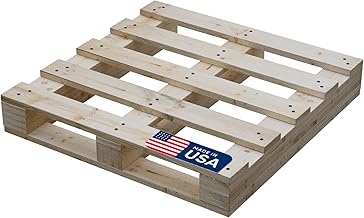
3. Wooden Pallet Bed Frame
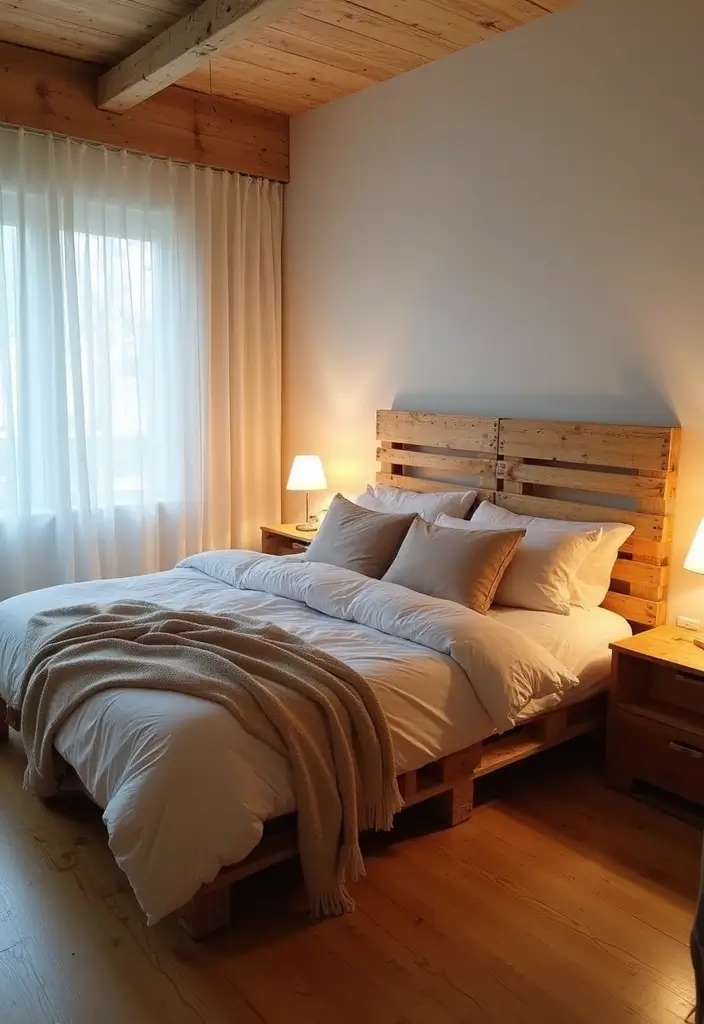
Start by gathering sturdy pallets that are free from damage. You’ll want enough to create a solid platform for your mattress. Secure the pallets together with screws for added strength. Don’t forget to sand down any rough spots to avoid splinters. A coat of wood stain or paint will give your frame a polished finish. Plus, lifting your mattress with this frame opens up space underneath for storage—a perfect spot for blankets or shoes!
Here are some practical tips to get you started:
• Choose high-quality pallets to ensure durability and safety.
• Sand thoroughly to avoid sharp edges and splinters.
• Consider adding a headboard using extra pallets for a complete look.
• Decorate with fairy lights along the edge for a magical atmosphere.
With just a little effort, you can create a bed frame that feels both stylish and unique, making your bedroom a true sanctuary.
Surprising fact: upcycled furniture projects like a wooden pallet bed frame can cut costs by up to 60% while giving your bedroom a warm, rustic vibe. Gather sturdy pallets, sand, seal, and finish in mahogany or whitewash for a personalized, budget-friendly makeover.
Wooden Pallet Bed Frame
Editor’s Choice
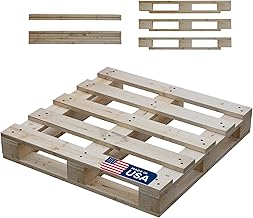
Greaton, Unassembled Heavy-Duty Wooden Pallet Kit – 48x40x5 Inches, Indu…

90PCS Premium Micro Detail Sander Kit, Updated 3-in-1 Mini Hand Sanding …

Varathane Premium Fast Dry Wood Stain, Half Pint, Dark Walnut
4. Old Chair Makeover

Breathe new life into that old chair sitting in your corner! With a little creativity, you can turn it into a stylish accent piece that brightens up your space. This project is beginner-friendly and can easily be completed over a weekend.
Start by selecting a chair that’s sturdy. Look for one with good structure, even if the upholstery is worn. Remove the old fabric and foam if needed, and don’t be afraid to experiment with new materials. Choose a fabric that speaks to your style—bold geometric patterns or calming pastels can make a big impact! You might even want to paint the frame a cheerful color, like sunny yellow or deep teal, to add a splash of personality.
Finish off your makeover with fresh cushions or throw pillows for extra comfort. This chair can become a stunning focal point in your living room or bedroom, making the area feel inviting and warm.
Quick Tip: Use fabric glue to easily secure the edges when you’re working on upholstery.
Here are some practical steps to get you started:
• Choose a chair with a solid frame for the best results.
• Pick fabric that reflects your personality—think fun prints or classic solids.
• Paint the chair frame in a lively color to make it stand out.
• Add new cushions or throw pillows for style and comfort.
With these simple tips, your upcycled chair will not only look brand new, but it will also tell a story of creativity and style. Get ready to enjoy your beautiful transformation!
Old Chair Makeover
Editor’s Choice

TinaKim Canvas Upholstery Fabric, Faux Linen Type Cloth Material,for Cou…

Fabric Glue Permanent, 60 ML Washable Clear Clothing Glue, Super Fabric …

Utopia Bedding Throw Pillows (Set of 4, White), 18 x 18 Inches Pillows f…
5. Ladder Shelf

Imagine turning a forgotten wooden ladder into a stunning shelf that breathes life into your space! This creative project not only adds charm but also serves multiple purposes. Picture it standing proudly in your living room or bathroom, holding your favorite books, potted plants, or decorative baskets. As seen on Pinterest, these ladder shelves are a trendy way to showcase your personality while staying stylish.
To make this project your own, start by giving the ladder a good sanding. Choose a finish that complements your room—maybe a warm wood stain or a crisp whitewash for a rustic feel. Lean it against a wall and let it work its magic. You can create a cozy reading nook or a refreshing green corner with just a few simple decorations. This approach not only saves space but also makes your home feel welcoming and uniquely yours.
Want to dive in? Here are some practical tips to get you started:
Use a ladder that matches your existing decor style.
Choose potted plants or books that bring color and life.
Add hooks to the sides for hanging towels or bags, perfect for entryways or bathrooms.
Place decorative items like candles or framed photos to personalize your shelf.
With just a bit of creativity, you can transform an old ladder into a beautiful, functional piece that enhances your home. It’s a simple yet satisfying way to express your style while being budget-friendly!
Ladder Shelf
Editor’s Choice
Varathane Premium Fast Dry Wood Stain, Half Pint, Dark Walnut

Costa Farms Live Plants (3 Pack), Easy to Grow Real Indoor Houseplants, …

20 PCS Vintage Metal Wall Hooks, Bohemian Decorative Hook with Screws, W…
6. Crate Side Table

Transforming wooden crates into a charming side table is an easy and rewarding DIY project. Not only does it add rustic flair to your space, but it also showcases your creativity and resourcefulness. Imagine stacking two or three crates, each one displaying its unique character. You can paint them in a trendy color, like soft sage green or classic white, to match your room’s decor. Pinterest is buzzing with ideas for these versatile pieces, perfect for creating a cozy atmosphere.
To get started, gather your materials: wooden crates, sandpaper, wood glue, and paint. Stack the crates vertically and secure them using wood glue for added stability. Once dry, sand the surfaces to remove splinters and rough edges. Paint them or leave them natural for a more organic look. If you want a sleek finish, consider adding a piece of glass on top. This project is affordable and allows you to express your style. It’s perfect for placing drinks, books, or decorative items, making your living space feel inviting and functional.
• Stack crates securely for a stable base.
• Sand surfaces smooth to avoid splinters.
• Paint in colors that match your decor.
• Add glass for a polished finish or leave bare.
Want to take it a step further? Add wheels to the bottom of your crate table for easy mobility. This way, you can move it effortlessly around your home, adapting to your needs. Whether you’re hosting friends or enjoying a quiet evening, this side table will be a stylish addition to your space.
Fun fact: upcycled furniture projects like crate side tables can cut material costs by up to 60% compared to buying new. With just 2–3 crates and a splash of paint, you create a unique, budget-friendly piece that adds rustic charm to any room.
Crate Side Table
Editor’s Choice

Wooden Crates 2 Pack, Rustic Handmade Wood Crate with Handles, Durable L…

Romeda 8-Pack Sandpaper Block, Four Grits Per Pack 60/80/120/220, Washab…

Gorilla Wood Glue; 8 Ounce Bottle; Natural Wood Color; (Pack of 1)
You might also like

7. Mason Jar Chandelier
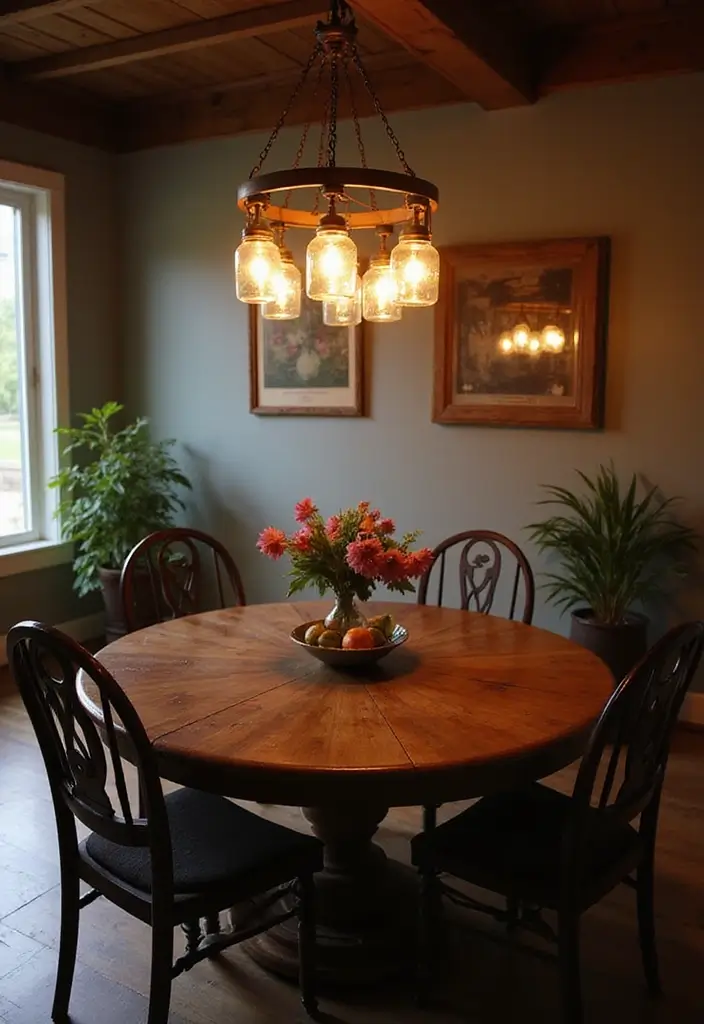
Create a stunning mason jar chandelier to bring a rustic charm into your home. This delightful lighting fixture can instantly uplift the mood of your dining room or kitchen. Imagine soft, twinkling fairy lights or flickering candles glowing from each jar, creating a warm, inviting atmosphere. Use classic glass mason jars and rustic wood for a beautiful contrast. Pinterest users adore this DIY project for its simplicity and elegance.
To get started, gather a few mason jars, a wooden beam, or a circular base. Attach the jars at different heights for a more dynamic effect. You can find jars at thrift stores or even in your kitchen. Fill each jar with mini lights or tea candles for that cozy vibe. This project is budget-friendly, allowing you to showcase your creativity without breaking the bank. Plus, it makes your space feel more personal and welcoming, perfect for family gatherings or cozy dinners.
• Collect different jar sizes for visual interest.
• Use warm white lights for a cozy glow.
• Hang from a sturdy ceiling hook for safety.
• Choose a wooden base to match your decor style.
With just a few materials and a little time, you can create a beautiful centerpiece that feels like a piece of art. Enjoy the process, and let your creativity shine as you craft this charming chandelier!
Mason Jar Chandelier
Editor’s Choice

12oz Glass Jars With Lids Regular Mouth 20 Pack -Mason Jars 12 oz For Cr…

TJOY 6 Pack A19 LED Light Bulbs, 60 Watt Equivalent LED Bulb, Soft Warm …

Picture Hanging Wire #2 100-Feet Braided Picture Wire Heavy for Photo Fr…
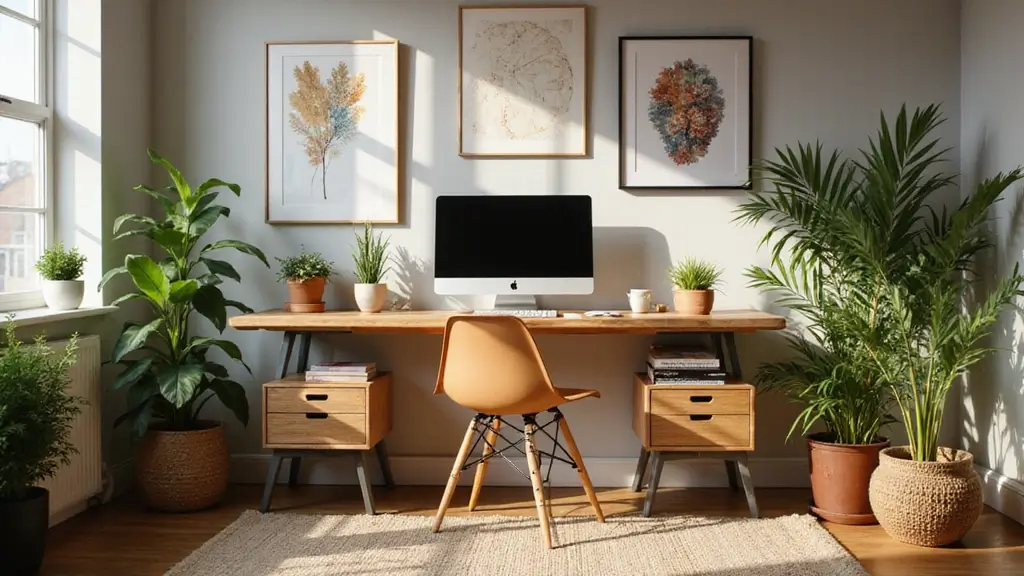
8. Desk from a Door
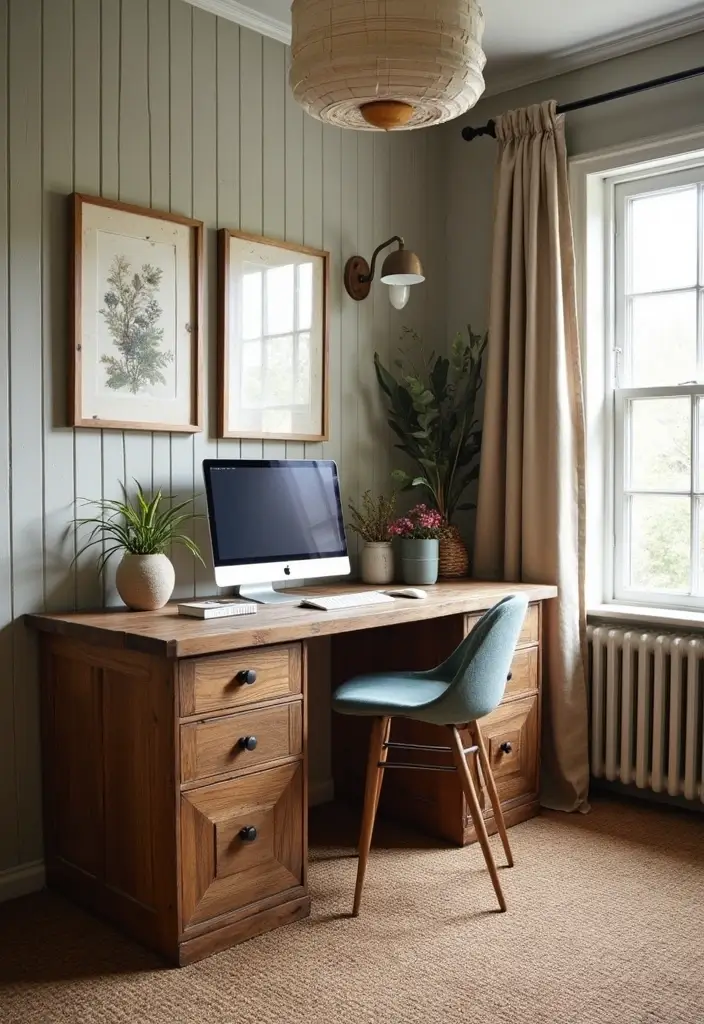
Transform an old door into a stunning desk that elevates your workspace! This fun and budget-friendly project not only adds style but also creates a unique focal point in your home office. Picture a beautifully distressed door as your desktop, paired with sleek file cabinets or sturdy sawhorses. This look is trending on platforms like Pinterest, where creativity meets functionality.
Begin this DIY adventure by selecting a door that resonates with your style. Whether it’s a vintage wooden door with character or a modern panel door, make sure it complements your decor. Once you have your door, secure it to two robust file cabinets or sawhorses. This step ensures stability and durability for all your work needs. Don’t forget to sand down the surface for a smooth finish, then choose a paint or stain that fits seamlessly with your office colors.
To make your desk even more functional, consider adding decorative elements like a chic pinboard or stylish organizers. These small touches not only enhance usability but also let your personality shine through the space, creating a welcoming environment perfect for productivity.
Here are some practical tips to get you started:
Choose a door that matches your home style.
Sand the surface for a smooth finish.
Add decorative items to enhance functionality.
Use a protective finish to keep it scratch-free.
This desk project is perfect for those seeking a unique workspace. Not only do you save money, but you also create something truly one-of-a-kind. Enjoy the satisfaction of turning something old into a stylish centerpiece for your home office!
Desk from a Door
Editor’s Choice
Dura-Block Set 6pc – Flexible EVA Foam Wet or Dry Autobody Sanding Block…

Minwax Fast Drying Polyurethane Protective Wood Finish, Clear Semi-Gloss…

DOLLAR BOSS Bulletin Boards with Linen 1-Pack 16”X 12” Double-Sided Co…
9. Bookshelf from Wine Crates
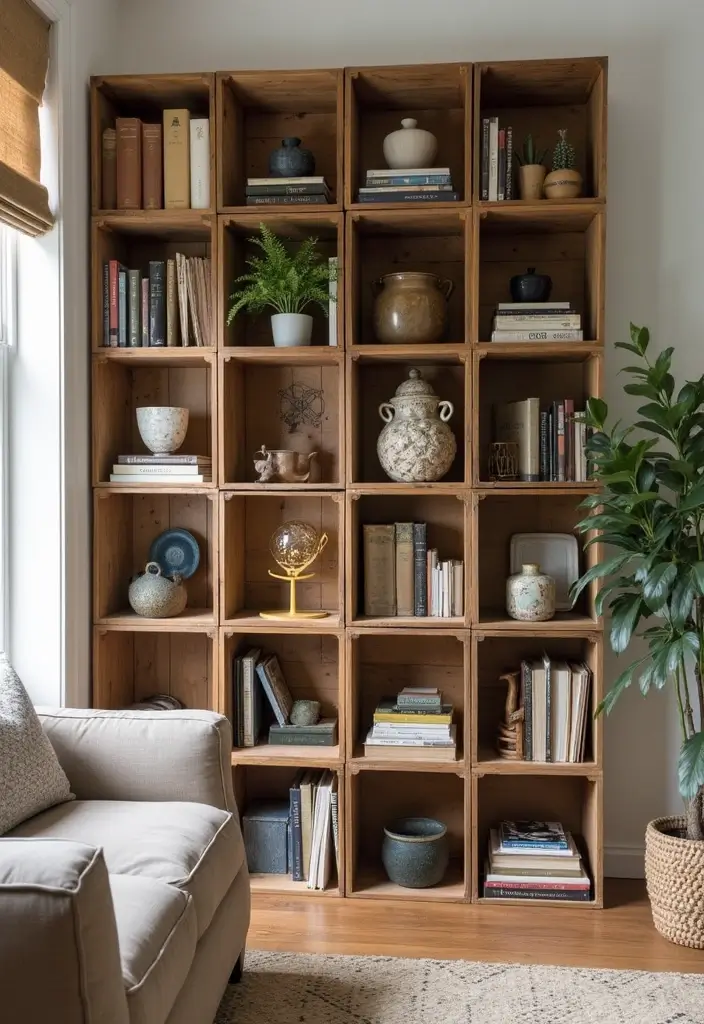
Turn your old wine crates into a stunning bookshelf that breathes new life into your space. This project is perfect for wine enthusiasts or anyone wanting to add a touch of rustic charm to their home. Imagine a bookshelf that not only holds your favorite novels but also serves as a beautiful focal point in your living room.
Start by stacking a few wine crates in a design that fits your style. You can arrange them vertically or horizontally, depending on your needs. Secure the crates together with wood glue or brackets for safety. Next, choose a color that matches your decor—soft pastels or bold, rich tones work beautifully. You might even consider a distressed finish for that trendy farmhouse look. Pinterest is full of ideas for inspiration, showcasing everything from sleek modern designs to cozy cottage styles.
When it comes to making your wine crate bookshelf, keep it budget-friendly. You can often find wine crates at thrift stores or online marketplaces for a low price. If you’re feeling creative, experiment with adding hooks or baskets to store small items. This project allows you to be playful and personal, making your living space feel warm and inviting.
Here are some tips to get you started:
• Stack crates securely for stability.
• Choose colors that match your existing decor.
• Mix orientations for a fun, eclectic look.
• Add decorative items like plants or photos to enhance the display.
With these simple steps, you’ll create a unique bookshelf that not only organizes your books but also adds character to your home. Enjoy the process of crafting something truly special!
Bookshelf from Wine Crates
Editor’s Choice
Gorilla Wood Glue; 8 Ounce Bottle; Natural Wood Color; (Pack of 1)

6 Pack Floating Shelf Brackets, 6 Inch Heavy Duty Industrial Shelf Brack…

55PCS Acrylic Paint Set of 36 Colors 2fl oz 60ml Bottles 12 Brushes,Non …
10. Stool from Old Tire
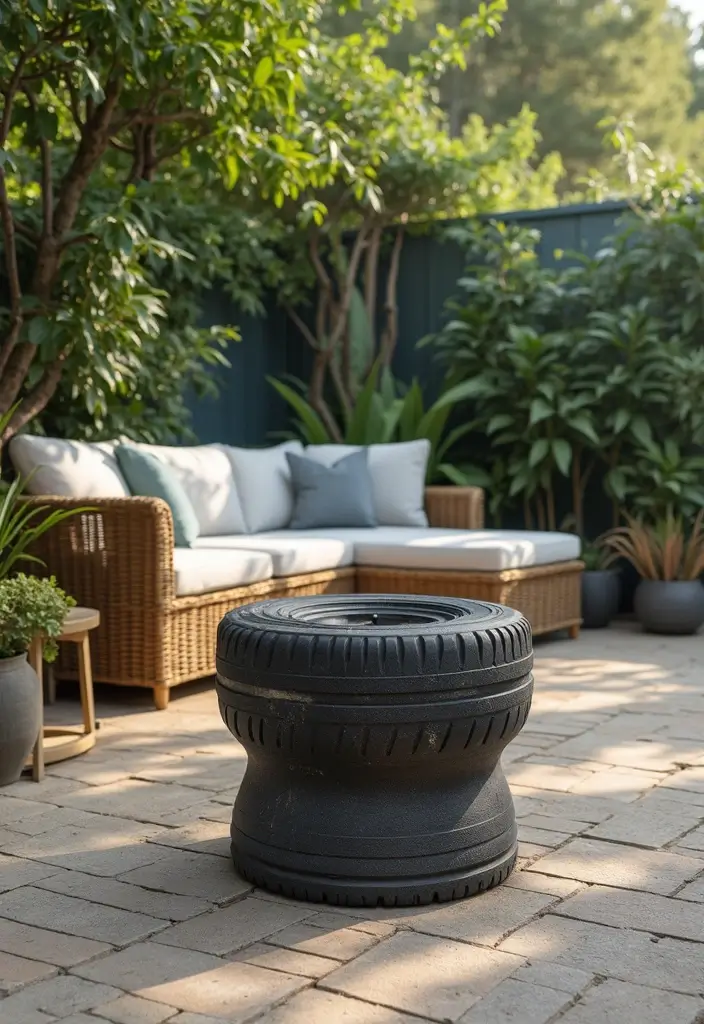
Transforming an old tire into a unique stool is not just a fun project; it’s a creative way to add character to your outdoor space. This eco-friendly stool serves as a stylish seating option for gardens, patios, or even children’s play areas. Imagine wrapping the tire in vibrant rope or colorful fabric to brighten up your surroundings. Pinterest is buzzing with ideas like this, showcasing how upcycled furniture can look fresh and inviting.
To get started, make sure to clean the tire thoroughly before you begin your transformation. Choose affordable materials like fabric remnants or outdoor rope that can withstand the elements. If you want extra comfort, add a cushioned top using foam and a waterproof cover. This DIY project not only adds whimsy to your decor but also creates a cozy spot for relaxing and chatting with friends. Plus, it’s a conversation starter that shows off your creative side!
• Clean the tire thoroughly to remove dirt and grime
• Wrap it in colorful rope or fabric for style
• Add a cushioned top for comfort and flair
• Place it in outdoor areas for a fun touch
This tire stool is a simple, budget-friendly way to enhance your outdoor spaces. It’s perfect for those who love to personalize their decor while being kind to the planet. Get creative and enjoy your new seating solution!
Stool from Old Tire
Editor’s Choice

TECEUM Rope 1000lb – 1/4” & 3/8” – 90 FT | 150 FT – Strong All-Purpose U…

GoTo Foam 2″ Height x 24″ Width x 72″ Length 43ILD (Firm) Upholstery Cus…

9KM DWLIFE Fabric, Black Waterproof Ripstop Nylon Fabric 40D, 60×39 Inch…
You Might Also Like
11. Upcycled Garden Bench
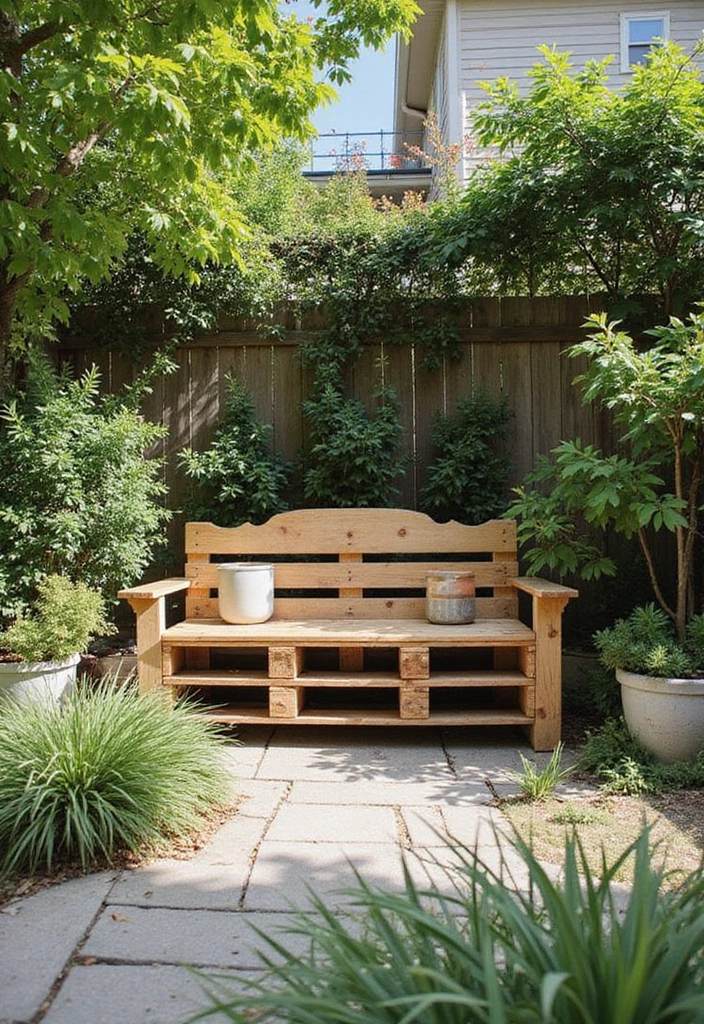
Create a stunning upcycled garden bench that breathes new life into your outdoor space. Imagine a cozy spot where you can unwind with a good book or sip your morning coffee. By using old wooden pallets or reclaimed furniture, you can craft a piece that not only looks stylish but also invites relaxation. Pinterest is buzzing with inspiration for these charming benches, showcasing natural wood finishes and vibrant cushions that pop against lush greenery.
To start this project, gather sturdy wooden pallets. Stack them to your desired height and length, ensuring they are stable. Sand down any rough edges to prevent splinters. For protection against the elements, apply an outdoor weatherproof stain in colors that complement your garden. Want to make it even cozier? Add outdoor cushions in fun patterns or colors for a splash of personality. This bench can also serve as a lovely focal point in your yard, surrounded by potted plants or decorative lanterns, making your garden feel inviting.
Here are some practical tips to help you get started:
Use durable pallets that can withstand outdoor conditions.
Choose a weatherproof stain that matches your garden’s color scheme.
Add cushions with outdoor fabric for comfort and style.
Place your bench in a shaded area for the perfect relaxation spot.
With these steps, you’ll create a beautiful space that feels welcoming and personal, perfect for enjoying time with family and friends in your own backyard oasis!
Did you know a single pallet can become a sturdy garden bench in just 3 simple steps? Upcycled furniture projects save you 60% vs. store-bought—and the results look just as polished. Turn discarded wood into a cozy outdoor retreat today.
Upcycled Garden Bench
Editor’s Choice

Ready Seal 512 5-Gallon Pail Natural Cedar Exterior Stain and Sealer for…

Outdoor Chair Cushions Set of 4, Waterproof Backrest and Deep Seat Cushi…
Treaton, Heavy-Duty 2-Way Entry Wooden Pallet – 38x36x5”, Industrial-Gra…
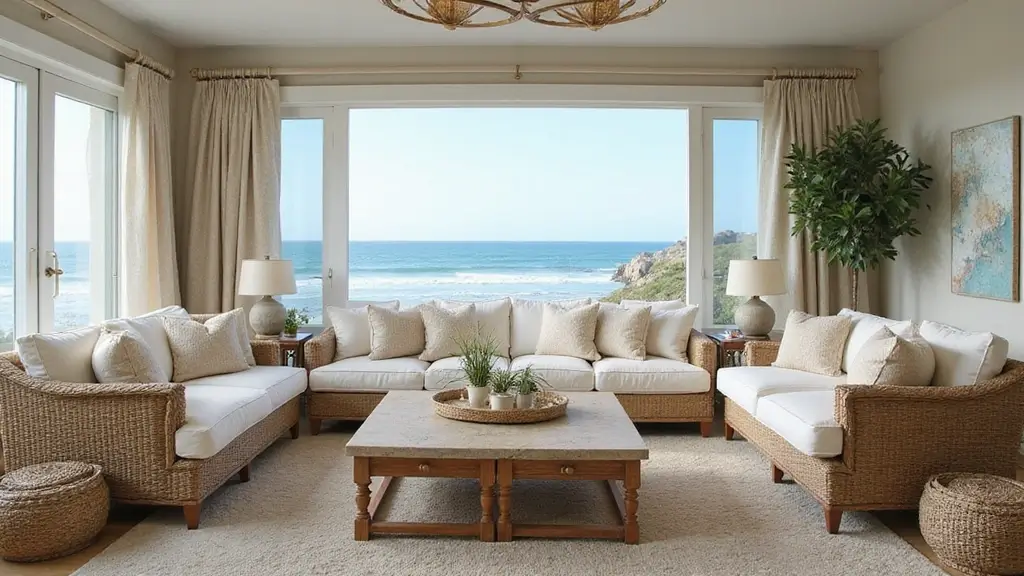
12. Reclaimed Wood Dining Table
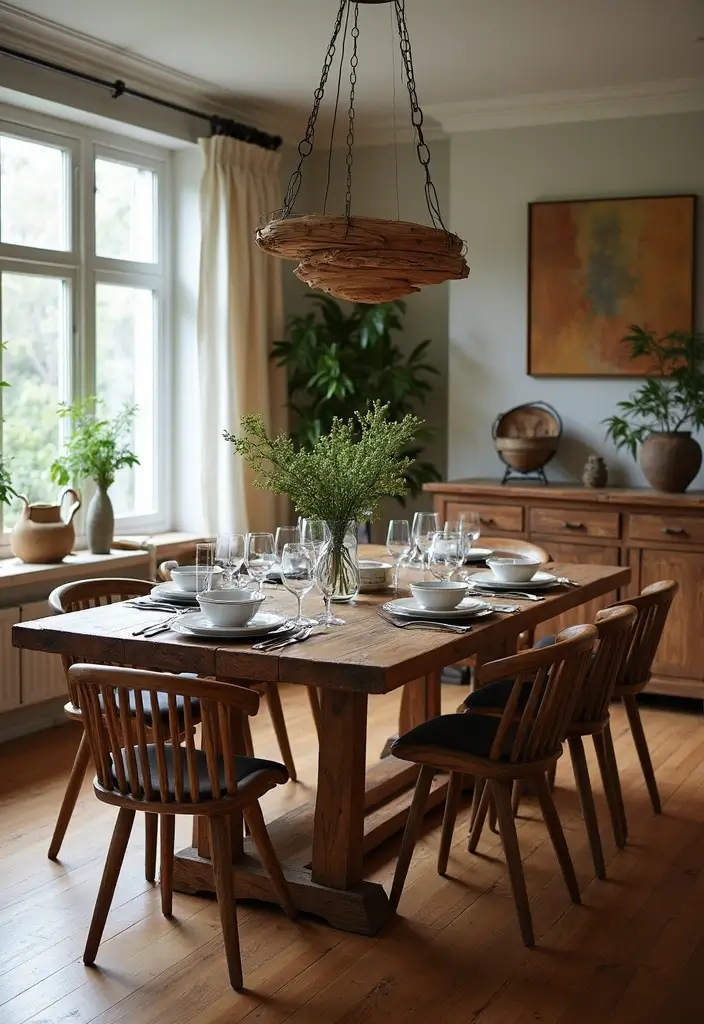
Create a beautiful dining table from reclaimed wood that not only looks stunning but also respects the environment. This project can easily fit into any home style, whether you’re going for rustic farmhouse vibes or a sleek modern look. Imagine warm wood tones contrasting with bright dining room colors, giving your space a fresh feel. Pinterest is full of inspiration for these tables, showcasing unique designs that turn heads.
To start, collect reclaimed wood that’s in good shape. You’ll find plenty at local salvage yards or online marketplaces. Measure your desired tabletop size and arrange the wood pieces in a way that works for you. Secure them with wood glue or screws for durability. For legs, consider using hairpin legs for a trendy touch or a sturdy wooden base to keep things classic. Don’t forget to finish it off with a wood sealant to protect against scratches and spills. This table will become the heart of your home, perfect for gathering with loved ones.
Here are some handy tips to help you with your project:
Choose reclaimed wood with interesting textures for a unique tabletop.
Use contrasting leg styles to enhance your design—mix sleek with rustic.
Add a bright table runner or bold placemats to make the table pop.
Place it in a well-lit area to highlight its beautiful wood grain.
With your new table, you’ll create a warm and inviting atmosphere that family and friends will love. It’s not just a piece of furniture; it’s a statement of style and sustainability.
Reclaimed Wood Dining Table
Editor’s Choice

Tried & True Original Wood Finish, 8 oz. – Linseed Oil & Beeswax Blend, …

SMARTSTANDARD 16″ Hairpin Furniture Legs, Metal Home DIY Projects for Ni…
Gorilla Wood Glue; 8 Ounce Bottle; Natural Wood Color; (Pack of 1)
Conclusion
Upcycling furniture isn’t just a way to save money—it’s about creativity and sustainability.
These 12 projects offer inspiration for anyone looking to add a personal touch to their home decor while being eco-friendly. Whether tackling a weekend project or planning a comprehensive home makeover, each of these ideas can breathe new life into old furniture and make your space truly yours.
Why not give one a try and share your results? Your home is your canvas!
Note: We aim to provide accurate product links, but some may occasionally expire or become unavailable. If this happens, please search directly on Amazon for the product or a suitable alternative.
This post contains Amazon affiliate links, meaning we may earn a small commission if you purchase through our links, at no extra cost to you.
Frequently Asked Questions
What Are Upcycled Furniture Projects and Why Are They Popular?
Upcycled furniture projects involve transforming old or discarded furniture pieces into something new and beautiful. The popularity of these projects stems from a desire for unique, one-of-a-kind decor that also promotes sustainability.
People love the idea of giving furniture a second life while saving money and reducing waste. Plus, with budget decor options, you can create stunning pieces without breaking the bank!
What Types of Recycled Materials Can I Use for DIY Furniture Projects?
When it comes to DIY furniture projects, the possibilities are endless! You can use materials like reclaimed wood, old pallets, vintage suitcases, or even discarded doors.
Think creatively—items like glass jars, old furniture hardware, and fabric scraps can also be repurposed. The goal is to give new life to materials that might otherwise end up in a landfill, making your home decor both stylish and environmentally friendly.
How Can I Start My First Upcycled Furniture Project?
Starting your first upcycled furniture project is easier than you think! Begin by selecting a piece of furniture that needs some love, like an old chair or a side table.
Next, gather your supplies—paint, sandpaper, and any decorative elements you want to add. Look for inspiration online or in magazines to spark your creativity. Remember, the key is to have fun and express your personal style while creating budget-friendly makeovers.
Are Upcycled Furniture Projects Suitable for Beginners?
Absolutely! Upcycled furniture projects are perfect for beginners because they allow you to learn new skills at your own pace. Start with simple projects that require minimal tools and techniques, like painting or distressing furniture.
As you gain confidence, you can tackle more complex projects. Plus, there are numerous resources available online, including tutorials and community groups, that can help you along the way!
What Are Some Tips for Successfully Upcycling Furniture on a Budget?
Upcycling furniture on a budget is all about being resourceful! First, look for free or inexpensive pieces at garage sales, thrift stores, or even your own home.
Use affordable materials like paint, fabric, or stencils to refresh your furniture. Don’t hesitate to get creative—mix and match styles or colors to create a unique look. Lastly, consider swapping materials or tools with friends to save even more money while you work on your home makeover!
Related Topics
upcycled furniture projects
budget decor
DIY furniture
recycled materials
home makeover
sustainable design
easy projects
vintage style
modern upcycle
creative repurposing
beginner friendly
home improvement
I love how creative these makeovers are! I once painted an old chair bright pink, and it turned out looking like a flamingo. At least now I have a conversation starter!
That sounds amazing, Bùi Xuân Hùng! A bright pink flamingo chair must really stand out-definitely a fun and unique conversation starter. Thanks for sharing your creative makeover!