
Blog
15 Seasonal DIY Projects That Will Make Your Home Shine for Every Holiday!
Every season brings its own unique beauty and charm, but it can be easy to let those moments slip by without truly embracing them. This post is all about celebrating the changing seasons with fresh, creative, and engaging projects that will brighten up your home for every holiday. As someone who loves the thrill of crafting and decorating, I felt inspired to share a collection of seasonal DIY projects that you can complete with your own hands. Whether you’re an experienced maker or just looking to dabble in crafts, there’s something here for everyone.
If you’re passionate about DIY and enjoy filling your space with festive decorations, you’re going to love what I have in store. This guide is for anyone looking to add a personal touch to their home for each holiday. You’ll find projects that are easy to follow and materials that you can often find around your house or at your local craft store. Each project is designed to bring joy and creativity to your space, making it feel warm and inviting for friends and family.
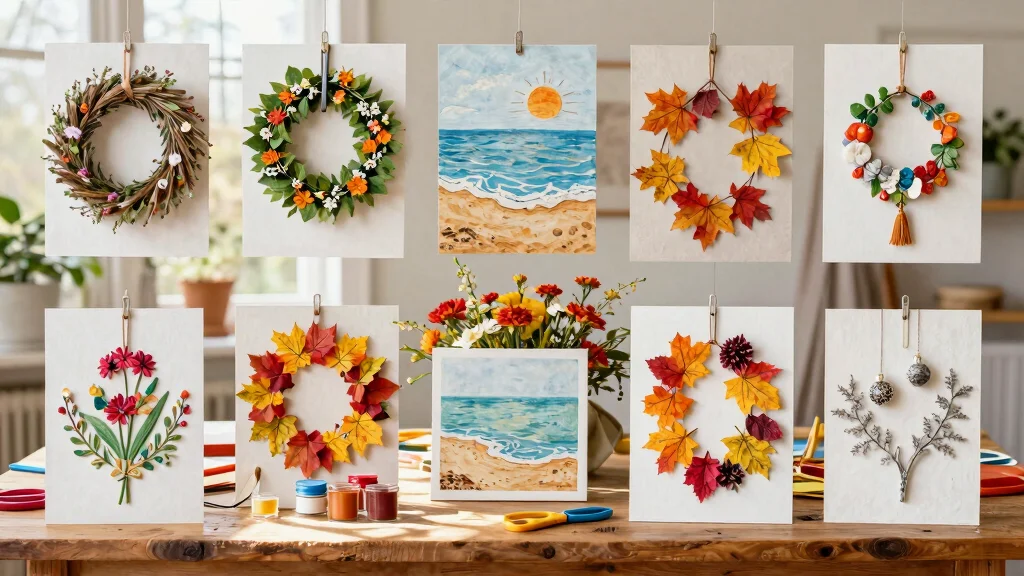
Get ready to dive into 15 seasonal DIY projects that will not only make your home shine but will also inspire your imagination. From spring floral wreaths to autumn leaf garlands, there’s no shortage of ideas waiting for you. Let’s get crafting!
Key Takeaways
– Discover 15 seasonal DIY projects that cater to every holiday, from spring to winter.
– Each project is designed to be simple yet impactful, allowing you to personalize your space.
– Find materials that are often already at home or easily sourced from local craft stores.
– Enjoy crafting as a fun activity, whether alone or with family and friends.
– Transform your home into a cozy, inviting space that reflects the beauty of each season.
1. Spring Floral Wreath
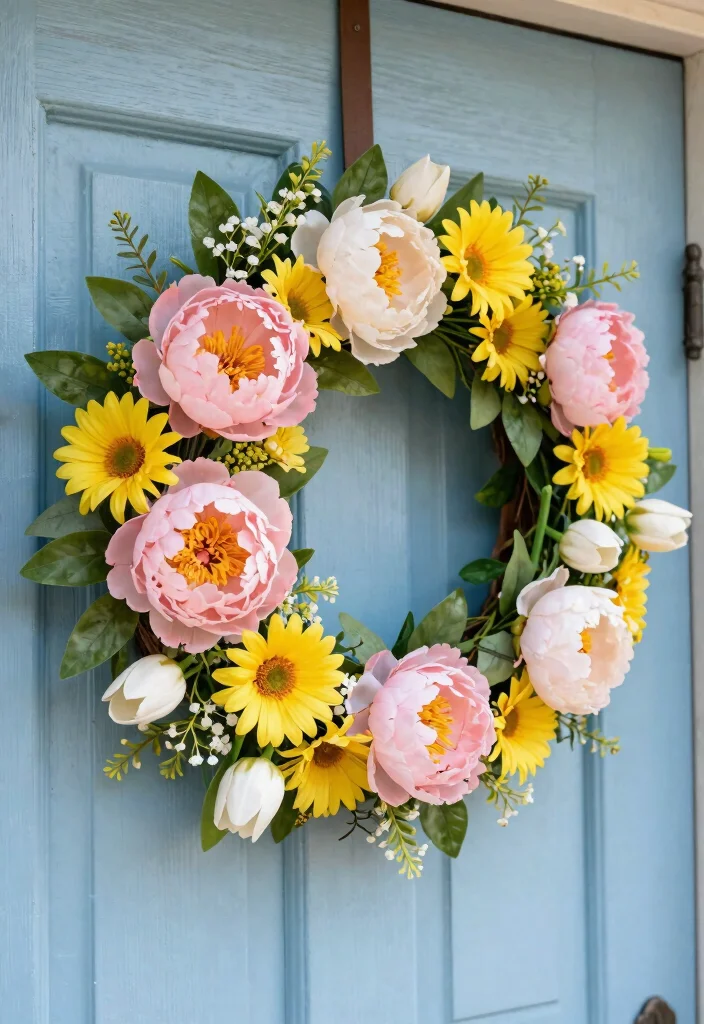
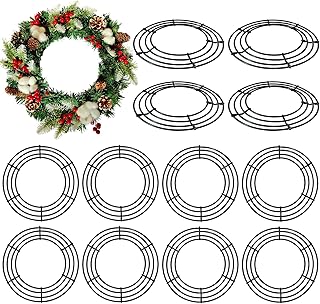
Spring is here, and what better way to welcome it than with a vibrant floral wreath on your door? This DIY project lets you express your creativity by blending colors and textures, using either faux or fresh flowers. Start with a sturdy wire frame and select flowers like peonies, daisies, or tulips to create a stunning seasonal piece that radiates joy and life. Don’t forget to add leaves to give your wreath a fuller look!
For a bit of flair, choose flowers in contrasting hues to make your wreath stand out. If you opt for real flowers, be sure to give them some extra care to keep them fresh.
Materials Needed:
– Wire wreath frame
– Faux or real flowers
– Floral wire
– Hot glue gun
– Greenery (ferns, eucalyptus)
Steps:
1. Trim stems to about 6 inches long.
2. Arrange flowers on the wreath frame to find a pleasing layout.
3. Secure flowers with floral wire, adding greenery in between.
4. Once satisfied, use a hot glue gun to secure everything in place.
5. Hang your masterpiece on the front door or in your home!
This project adds a cheerful touch to your home, transforming your entryway into a welcoming space. You’ll enjoy the beauty of spring every time you walk through your door!
Spring Floral Wreath
Editor’s Choice


📹 Related Video: How to make 6 different spring floral wreaths!
You Might Also Like

2. Summer Beach-Themed Centerpiece
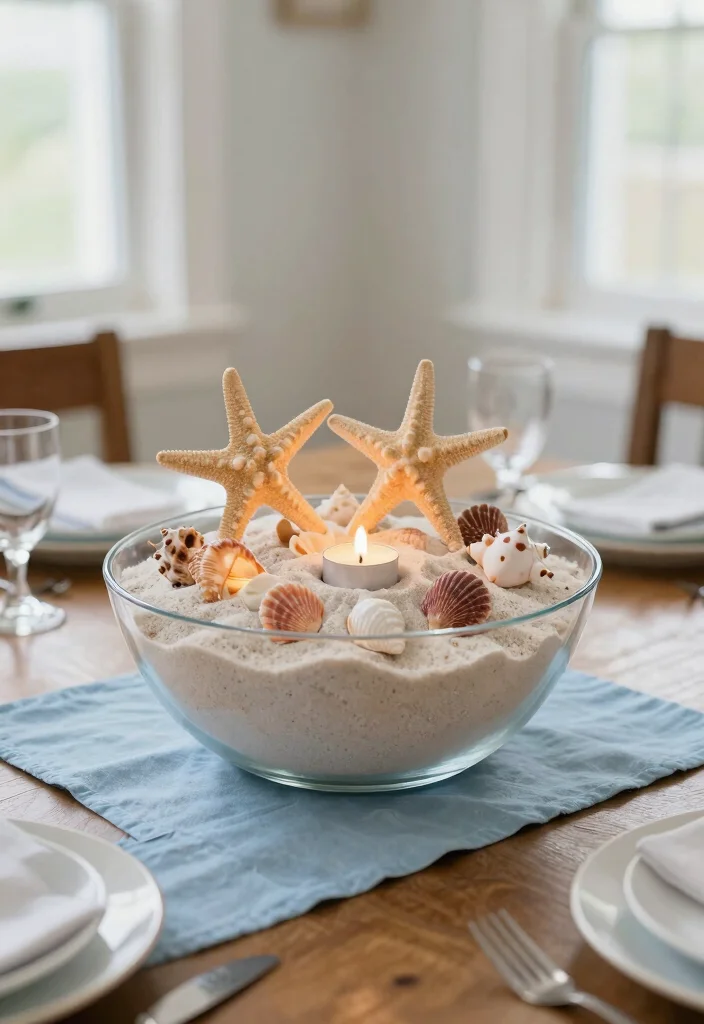
Bring a taste of the beach to your dining table this summer with a charming centerpiece. This project encourages you to gather shells, sand, and fun beach-inspired decor. All you need is a clear glass jar or bowl to layer sand at the bottom, then add shells, starfish, and even tealight candles to create a warm, inviting glow during summer evenings. It’s not just a decoration; it’s a conversation starter for all your gatherings!
Mix various sizes of shells for an engaging look. Consider using colored sand to add a vibrant pop to your display.
Materials Needed:
– Clear glass jar or bowl
– Sand
– Seashells and starfish
– Tealight candles (optional)
Steps:
1. Fill the bottom of your jar with a layer of sand.
2. Arrange seashells and starfish on top.
3. If using candles, place them securely among the shells.
4. Display the centerpiece on your dining table or patio.
This centerpiece captures the essence of summer, adding a touch of coastal charm to your home. Your guests will love the beachy vibe during every meal!
Fun fact: a 3-layer beach centerpiece using shells and sand is a tiny seasonal DIY that sparks conversation. Pro tip: layer with 2-3 shell sizes and seal the top with a tealight in a glass holder for safe, lasting glow.
3. Autumn Leaf Garland
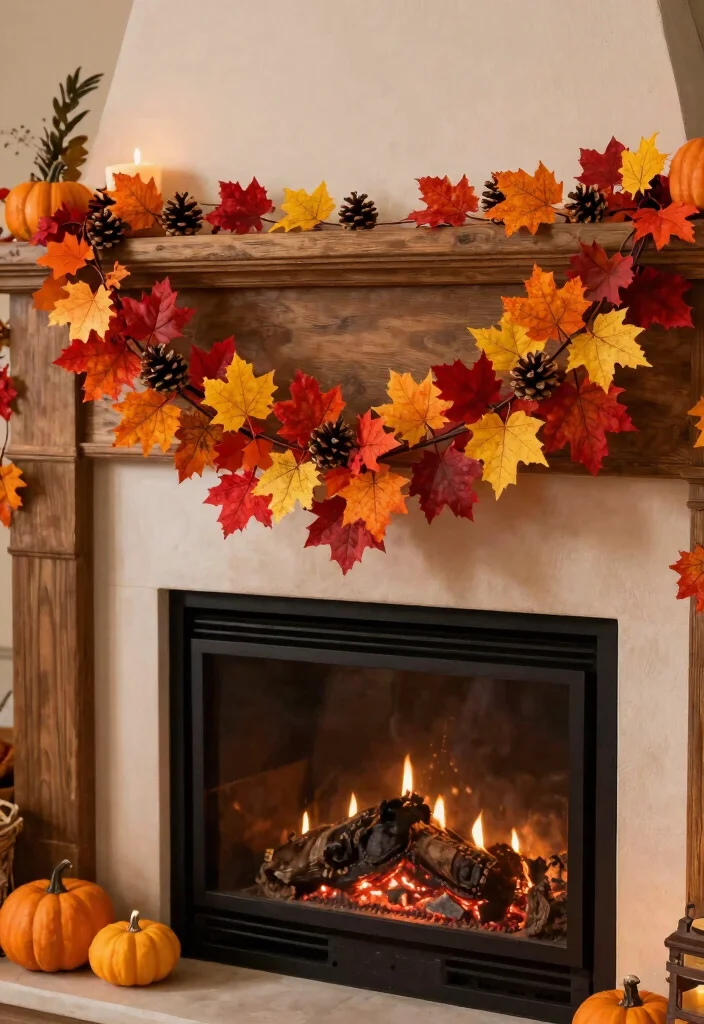
As fall approaches, it’s time to embrace the season’s beauty with an autumn leaf garland. This DIY project allows you to celebrate the rich colors of fall by gathering faux or dried leaves in shades of red, orange, and yellow. String them together with twine or attach them to burlap for a rustic flair. You can drape this garland over mantels, hang it in windows, or use it as a stunning table runner.
Add pinecones or dried flowers to enhance the natural look and feel of your garland.
Materials Needed:
– Faux or dried leaves
– Twine or burlap
– Scissors
– Hot glue (optional)
Steps:
1. Cut twine or burlap to your desired length.
2. Attach leaves along the twine using hot glue or tie them on.
3. Incorporate additional elements like pinecones for extra charm.
4. Hang your garland in your favorite spot!
This garland brings the warmth and coziness of autumn indoors. You’ll love how it brightens your space with seasonal beauty!
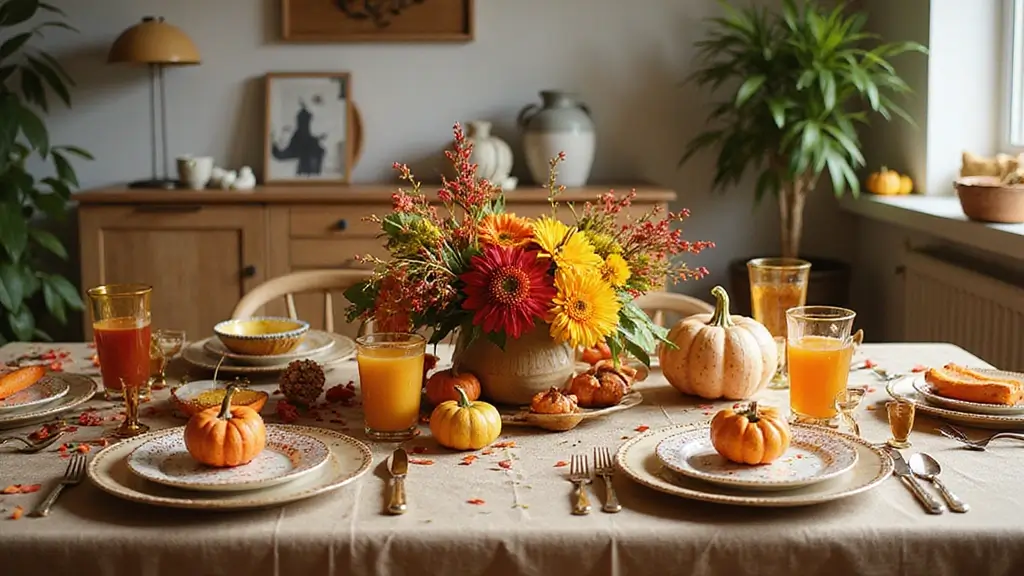
4. Thanksgiving Table Runner
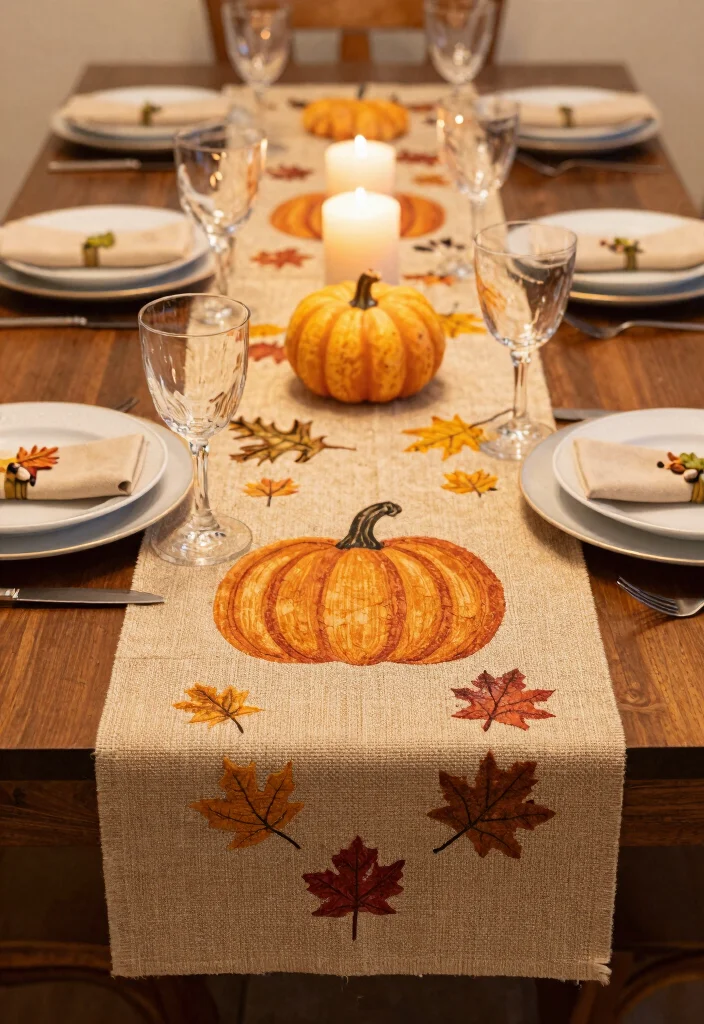
Create a stunning backdrop for your Thanksgiving feast with a handmade table runner that reflects the spirit of gratitude. This project is all about using natural materials, allowing a simple canvas or burlap runner to be enhanced by stencils or painted autumn motifs like pumpkins and leaves. This table runner not only beautifies your meal setting but also adds a heartfelt touch that your guests will cherish.
Opt for non-toxic fabric paint to ensure a safe dining experience for everyone.
Materials Needed:
– Canvas or burlap fabric
– Fabric paint
– Stencils or brushes
Steps:
1. Cut your fabric to the desired length for your table.
2. Use stencils or freehand to create your designs.
3. Allow the paint to dry completely before using.
4. Set your table with your beautiful runner as the centerpiece!
This table runner elevates your dining experience, making every meal a special occasion filled with warmth and love.
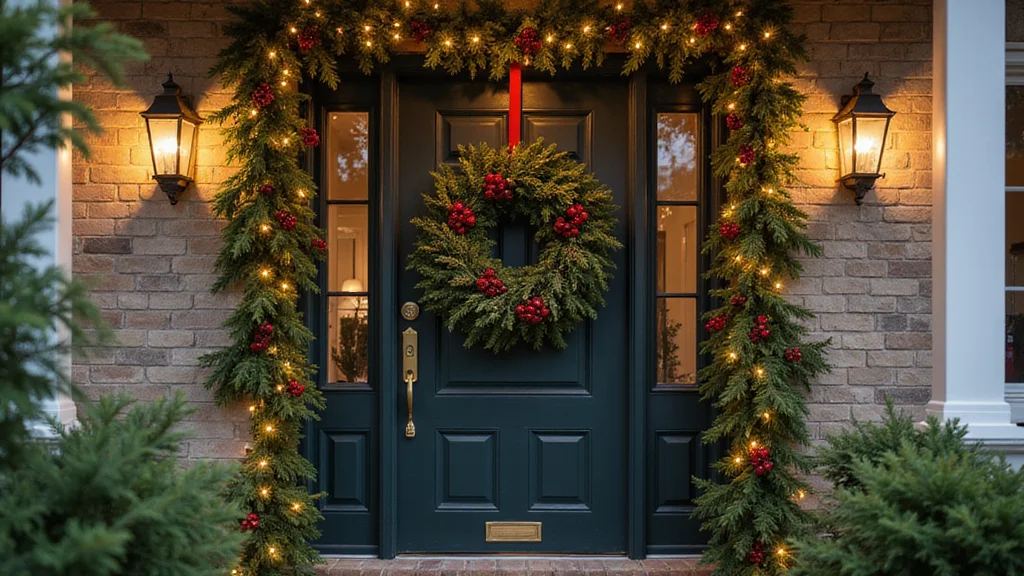
5. Christmas Ornament DIY
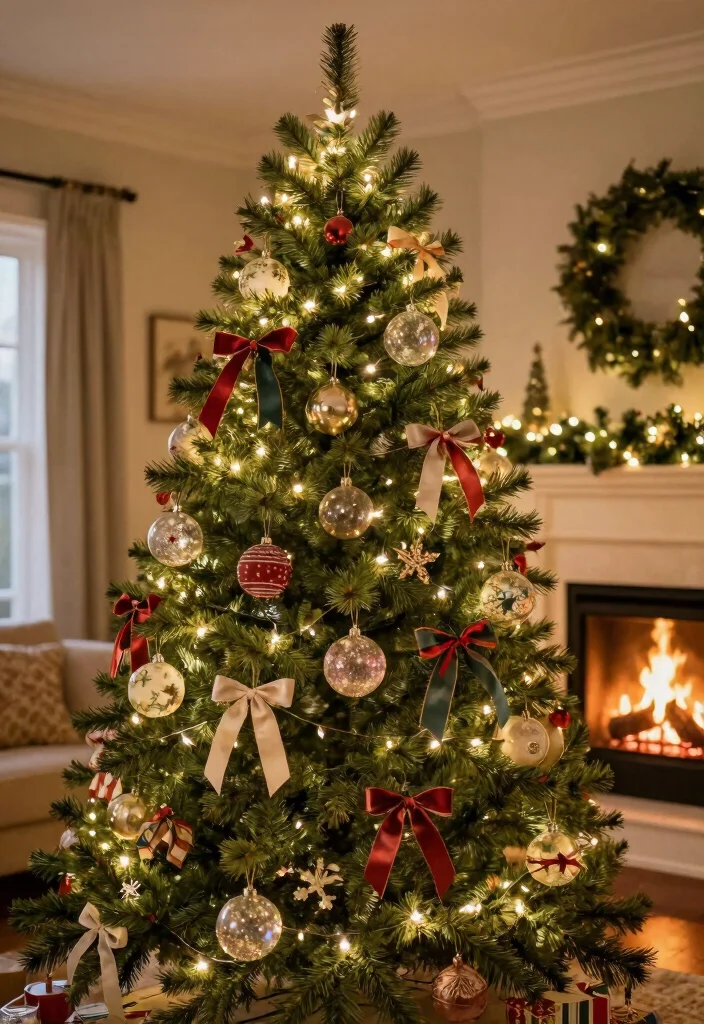
Get into the holiday spirit by crafting personalized Christmas ornaments! This fun project lets you decorate your tree in a unique way that reflects your family’s style. Use clear baubles to fill with glitter, faux snow, or even snapshots of family memories. You can also adorn the ornaments with paint, ribbons, or stickers for an extra festive flair. Each ornament adds charm to your tree and creates lasting memories for years to come.
Mix and match different styles of ornaments for a delightful, eclectic look.
Materials Needed:
– Clear ornaments (glass or plastic)
– Glitter or faux snow
– Ribbons
– Paint and brushes
– Family photos (optional)
Steps:
1. Unscrew the top from each ornament.
2. Fill with glitter or faux snow and replace the top.
3. Decorate the exterior with ribbons, stickers, or paint.
4. Hang on the tree and enjoy the festive atmosphere!
This project enhances your holiday decor, ensuring your tree shines bright with personalized touches and cherished memories.
6. New Year’s Resolution Jar

Start the New Year with a burst of motivation by creating a resolution jar! This fun DIY project helps you keep your goals visible throughout the year. Choose a simple jar and decorate it as you like. Write down your resolutions or goals on colorful paper strips and fill the jar. Each month, take a moment to reflect on your progress, turning this DIY into a visual reminder of your aspirations.
Use different paper colors to represent various aspects of your life, like health, travel, or personal growth.
Materials Needed:
– Glass or ceramic jar
– Colored paper
– Pens
– Decorative materials (glitter, ribbons)
Steps:
1. Decorate your jar to fit your style.
2. Cut colored paper into strips.
3. Write down your resolutions and fold the papers.
4. Fill the jar and display it prominently!
This resolution jar will inspire you throughout the year, encouraging you to stay focused on your goals and dreams.
How To Choose Seasonal DIY Projects for Your Home
Choosing the right seasonal DIY projects can enhance your home’s ambiance and reflect your personal style. Here’s how you can make the best decisions when selecting your next creative endeavor.
1. Consider Your Seasonal Theme
Think about the season and the specific holiday you want to celebrate. Each holiday has its own colors, symbols, and themes. For example, spring evokes floral patterns, while autumn brings to mind warm hues and leaves. Make sure your chosen project aligns with the holiday atmosphere you want to create. This way, your decorations will feel cohesive and festive!
2. Assess Your Skill Level
Be honest about your crafting skills. Some projects, like a simple floral wreath, may be easy for beginners. Others, like homemade ornaments, could require more advanced techniques. If you’re a novice, start with simpler projects and gradually work your way up. This will help build your confidence and ensure you enjoy the crafting experience.
3. Calculate Your Time Commitment
Different projects require varying amounts of time. Plan ahead to ensure you can complete your DIY on schedule. For example, a Thanksgiving table runner might take a few hours, while a holiday wreath can be done in under an hour. Set aside dedicated crafting time and consider your other commitments, so you don’t feel rushed.
4. Gather Your Materials
Make a list of materials you’ll need for your chosen project. Some DIY crafts require specific items that might not be readily available at home. For instance, a Diwali lantern may need colorful paper and lights, while a Halloween pumpkin decoration will require carving tools. Check your local craft stores or online shops to find the best deals. If you can, repurpose items you already have for a unique touch and to save money.
5. Set a Budget
Decide how much you want to spend on your DIY project. Crafting can be an affordable hobby, but costs can add up quickly. A simple centerpiece can be made with items from your garden, while elaborate projects may require more expensive supplies. Keep an eye out for sales and discounts, and stick to your budget to avoid overspending.
6. Think About the Space
Consider where you’ll display your finished project. The size and style of your home can influence your choices. For example, a large autumn leaf garland might look great on a long mantel, while smaller projects, like Valentine’s Day love notes, can brighten up a table or a wall. Visualize how your creations will fit into your space to enhance your home decor effectively.
Pro Tip: Don’t be afraid to mix and match ideas from different seasonal crafts. A Christmas ornament can inspire a New Year’s decoration, or a spring wreath can have elements of Easter. Your creativity is the limit!
With these tips in mind, you can confidently choose seasonal DIY projects that not only beautify your home but also bring joy to your crafting experience. Happy crafting!
7. Valentine’s Day Love Notes

Celebrate love in a unique way with a delightful DIY project that everyone can enjoy. Create a love notes jar filled with heartfelt messages to share with your partner, family, or friends. Decorate a jar with paper, lace, and ribbons, then fill it with notes expressing your love or favorite memories. This thoughtful project spreads affection throughout the year, making it a perfect gift for Valentine’s Day or any occasion.
Use colorful pens to make your notes visually appealing and fun to read.
Materials Needed:
– Glass jar
– Colored paper
– Pens
– Ribbon and lace for decoration
Steps:
1. Decorate the jar as desired.
2. Write love notes and fold them neatly.
3. Place them in the jar and tie it with a ribbon.
4. Gift it to someone special or display it at home!
This love notes jar brings warmth and joy to your home, reminding everyone of the love that surrounds them.
You might also like
8. Easter Egg Hunt Decorations

Make your Easter egg hunt extra special with some fun DIY decorations! Craft colorful banners or signs to guide guests to hidden eggs in your yard. Use cheerful pastel colors to match the spring theme. Consider creating oversized paper mâché eggs to place around your garden, adding whimsical charm to the festivities.
Opt for biodegradable materials for an eco-friendly project that everyone can enjoy.
Materials Needed:
– Cardstock or poster board
– Paint and brushes
– String for banners
– Paper mâché materials (balloons, newspaper)
Steps:
1. Create signs and banners and paint with fun designs.
2. For paper mâché eggs, inflate a balloon, layer with strips of paper, and let dry.
3. Once dry, decorate with paint.
4. Hide eggs and set up your decor for the hunt!
This project adds excitement and beauty to your Easter celebrations, ensuring a memorable hunt for everyone involved.
9. Halloween Pumpkin Decorations

Embrace the Halloween spirit by decorating your pumpkins in fun and creative ways! Instead of carving, consider painting them with spooky or whimsical designs using acrylic paints. Create patterns, faces, or even scenes to capture the essence of Halloween. Pair your painted pumpkins with spooky silhouettes or fabric ghosts around your home for a complete festive look.
Use stencils for intricate designs that add character to your decor.
Materials Needed:
– Pumpkins (real or artificial)
– Acrylic paints
– Paintbrushes
– Stencils (optional)
Steps:
1. Clean the pumpkins to remove dirt.
2. Sketch your design or use stencils to guide your painting.
3. Paint your pumpkins and let them dry.
4. Display your creations indoors or outdoors!
This project elevates your Halloween decor, making your home a festive haven that delights all who visit.
Fun fact: Painted pumpkins last 2–3 weeks longer than carved ones, keeping your Halloween vibe fresh without messy cleanup. This seasonal DIY trick means you can swap faces for scenes with just acrylic paints and a steady hand. Pro tip: seal designs with a matte spray for longer wear.
Halloween Pumpkin Decorations
Editor’s Choice


10. St. Patrick’s Day Shamrock Decor
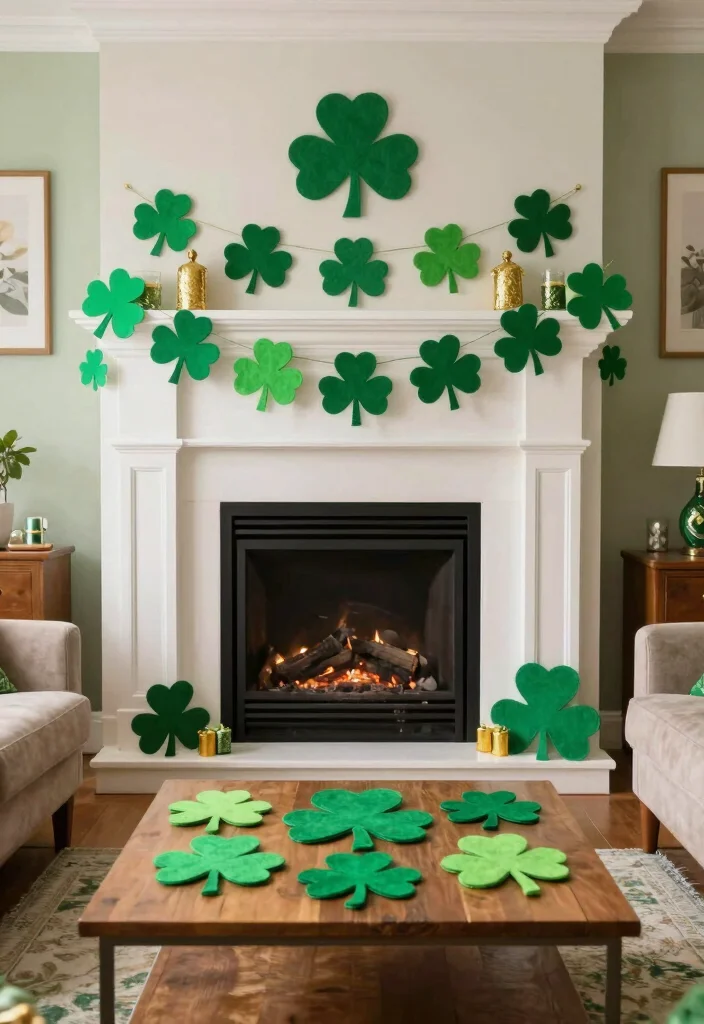
Celebrate St. Patrick’s Day with vibrant shamrock decorations that bring a touch of green into your home! Use felt or construction paper to cut out shamrock shapes, which you can string together to form a lovely garland or create a centerpiece for your table. This easy DIY project adds a cheerful and festive spirit to your decor.
Choose various shades of green for a lively and dynamic look.
Materials Needed:
– Green felt or construction paper
– Scissors
– String for garlands
– Glue (optional)
Steps:
1. Cut shamrock shapes from the felt or paper.
2. String them together or glue them to create a centerpiece.
3. Hang your garland or display the centerpiece in your home.
This project brightens up your space, creating a joyful atmosphere for the holiday!
St. Patrick’s Day Shamrock Decor
Editor’s Choice


11. Diwali Lanterns

Illuminate your home during Diwali with beautiful handmade lanterns! This project invites your creativity as you craft colorful paper lanterns with intricate designs. Cut geometric shapes from colored paper, then string them together with lights or place candles inside for a stunning glow. These lanterns not only brighten your space but also embody the joyful spirit of the festival of lights.
Experiment with various shapes and sizes to create a dynamic display.
Materials Needed:
– Colored paper
– Scissors
– String lights or tealight candles
– Glue and tape
Steps:
1. Cut the colored paper into your desired shapes.
2. Assemble the shapes using glue or tape.
3. Insert string lights or tealight candles safely inside.
4. Display your lanterns around your home for a festive touch!
This project transforms your space into a radiant celebration, filling it with warmth and joy during Diwali.
Diwali Lanterns
Editor’s Choice


12. Cinco de Mayo Papel Picado

Add a vibrant touch to your Cinco de Mayo celebration with traditional papel picado decorations! This fun craft involves cutting intricate designs into colorful tissue paper to create beautiful banners. Use a mix of bright colors and fun patterns to enliven your space, whether hung indoors or outdoors. This DIY project is simple, enjoyable, and perfectly captures the festive spirit of the holiday.
Use a craft knife for detailed cuts that really pop!
Materials Needed:
– Tissue paper in various colors
– Scissors or craft knife
– String for hanging
– Tape
Steps:
1. Fold the tissue paper into quarters for symmetrical designs.
2. Cut out shapes and patterns carefully.
3. Unfold the paper to reveal your designs.
4. String them up for decoration!
This project brings a festive flair to your celebrations, making every moment brighter and more colorful.
Fun fact: Papel picado dates back to the 1840s, turning a single sheet into dozens of vibrant banners. Pro tip: fold and cut with a craft knife to create intricate patterns fast, then mix bright colors for Cinco de Mayo that truly shines.
Cinco de Mayo Papel Picado
Editor’s Choice


You Might Also Like

13. Father’s Day Handprint Art
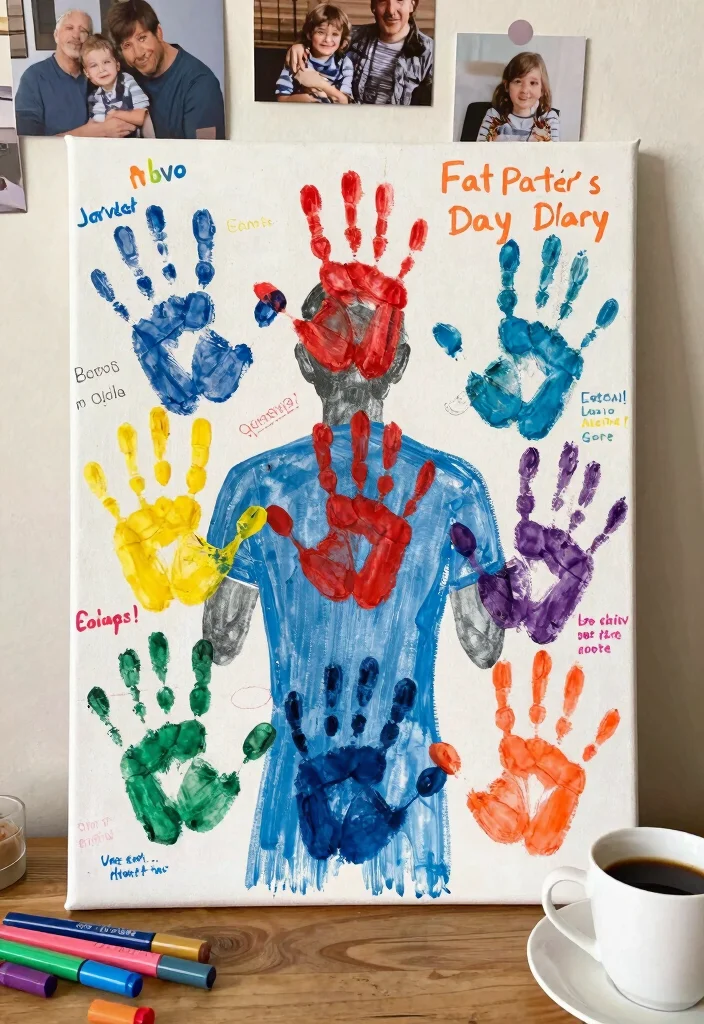
Honor Dad with a special touch this Father’s Day through creative handprint art! This simple yet meaningful DIY project uses non-toxic paint to create handprints on canvas or paper, forming fun designs like trees, hearts, or even goofy monsters. This unique art not only makes a wonderful gift but also becomes a cherished keepsake for years to come.
Ensure the paint dries completely to avoid any mess on the big day.
Materials Needed:
– Canvas or heavy paper
– Non-toxic paint
– Paintbrushes
– Optional decorations (markers, stickers)
Steps:
1. Paint Dad’s hand with a color of choice.
2. Press it onto the canvas to create the handprint shape.
3. Add any additional designs or decorations if desired.
4. Once dry, frame it or gift it as is!
This project allows you to express love and creativity, making Father’s Day truly special and memorable.
14. Back-to-School Cork Board

Prepare for a successful school year with a DIY cork board that makes organization fun! Start with a basic cork board and personalize it with colorful fabric or paint. Create distinct sections for assignments, reminders, or special notices, transforming it into a vibrant space for your child’s school year. This functional decor brightens their study area while keeping everything organized.
Use push pins in various shapes and colors to add extra flair!
Materials Needed:
– Cork board
– Fabric or paint
– Push pins
– Decorations (washi tape, stickers)
Steps:
1. Cover the cork board with fabric or paint in fun colors.
2. Use washi tape or stickers to create sections.
3. Hang it in a prominent spot for easy access.
4. Fill it with notes, reminders, and fun decor!
This project not only keeps your child organized but also adds a personal touch to their learning space, making it a joyful environment for studying.
15. Spring Cleaning DIY Organizers

Welcome the freshness of spring with stylish DIY organizers that help declutter your home! This project focuses on repurposing items around your house to create unique storage solutions. Use mason jars, old wooden crates, or fabric scraps to craft organizers that can hold everything from stationery to kitchen utensils. Not only will this tidy up your space, but it also adds a personal touch to your organization systems.
Add labels to keep everything sorted and easy to locate.
Materials Needed:
– Mason jars or old crates
– Paint or fabric
– Labels
– Scissors and glue
Steps:
1. Clean and prepare your storage items.
2. Decorate with paint or fabric as desired.
3. Use labels to mark what goes where.
4. Organize your belongings and enjoy the clutter-free space!
This project enhances your mood by creating a clean and organized environment, allowing you to enjoy the beauty of your home.
Conclusion
Transforming your space for every holiday has never been more exciting with these DIY projects! Each craft provides a unique way to express your creativity and celebrate the seasons. Whether it’s a cozy wreath for winter or vibrant decorations for spring, your personal touch makes every project special. Don’t hesitate to dive into these fun ideas and let your home shine all year long. Happy crafting!
Note: We aim to provide accurate product links, but some may occasionally expire or become unavailable. If this happens, please search directly on Amazon for the product or a suitable alternative.
This post contains Amazon affiliate links, meaning we may earn a small commission if you purchase through our links, at no extra cost to you.
Frequently Asked Questions
Which seasonal DIY decorations are quickest to make and work for every holiday?
Try versatile seasonal DIY decorations you can reuse year-round. Start with a simple base like a neutral garland, paper pennants, and a string of LED lights. Then swap color schemes and tiny accents (berries for winter, florals for spring) to fit each holiday without buying new supplies. A little spray seal keeps them looking fresh all season.
How can I repurpose craft supplies to create festive decorations for different holidays?
Use a modular approach: keep a core element (a wreath base, a tray centerpiece) and switch out accents (pinecones, ribbons, faux citrus, icons) to match the holiday. This seasonal DIY strategy saves money and reduces waste, while still delivering a polished decorations style. Plan one swap day per holiday and store components in labeled bins so you’re ready next year.
What beginner-friendly seasonal DIY projects can still look high-end?
Great question! Start with simple projects like a no-sew fabric garland, decoupage ornaments, or a wreath made from faux greenery. These seasonal DIY ideas are inexpensive, yet with a few finishing touches—like metallic accents, cohesive color palettes, and a simple bow—feel sophisticated for any holiday. Gather basic tools (scissors, glue, tape) and you’re ready to shine.
How can I plan a decorating day to ensure my home shines for every holiday?
Block out a weekend for a mini DIY decorating session. Create a 5-step plan: pick a theme, assemble a materials list, build 2-3 projects, test layouts, and store finished pieces neatly. Use a calendar reminder for each holiday and label storage so you can repeat the process with seasonal DIY momentum. A cohesive color story helps all decorations feel connected.
Are these seasonal DIY projects suitable for beginners or kids?
Absolutely! Many projects are beginner-friendly and safe for older kids with supervision. Choose projects with low-skill steps like garlands, painted jars, or stamped banners. These seasonal DIY tasks build confidence, spark creativity, and still deliver polished decorations for every holiday. Always follow safety tips and tailor complexity to the maker’s age.
Related Topics
seasonal DIY
holiday decorations
crafting ideas
easy projects
family-friendly
budget crafts
festive decor
quick crafts
themed projects
seasonal crafts
home improvement
DIY enthusiasts
I love these DIY project ideas! I tried making a pumpkin centerpiece last Halloween, and let’s just say it looked more like a sad squash than a decoration. What’s your favorite holiday project?
Did you know that making your own holiday decorations can save you a lot of money? I read that crafting can be 50% cheaper than buying ready-made stuff!